If you’ve launched your WooCommerce store, it’s essential to link it to tools such as Google Merchant Center, Meta Pixel, Google Tag Manager (GTM), Google Analytics 4 (GA4), and Google Search Console (GSC). These tools help you track users, improve performance, and show your products across Google and Meta platforms.
One key tool is Google Merchant Center, which helps display your products on Google Shopping. Normally, whenever you update a product, you must manually update it in Merchant Center. However, when your store is connected, this process occurs automatically.
This article will guide you through the step-by-step process of connecting WooCommerce to Google Merchant Center.
What Is WooCommerce?
WooCommerce is a popular WordPress plugin that enables you to transform your website into an online store. It works like Shopify but gives more control and flexibility. It’s cost-effective and straightforward to use, which is why many small businesses prefer it.
What Is Google Merchant Center?
Google Merchant Center is a free tool that enables you to upload and manage product listings across Google’s platforms. Once your products are connected, you can promote them on:
- Google Search
- Google Shopping
- YouTube
- Display Network
- Partner sites
Step-by-Step Guide to Connect WooCommerce with Google Merchant Center
Step 1: Prepare Your WooCommerce Store
Before connecting anything, ensure your WooCommerce store is set up and functioning correctly.
- Add your products with all details (name, price, SKUs, variations, images).
- Ensure your store has working product pages.
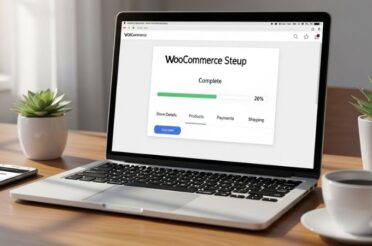
If your store isn’t ready yet, install WooCommerce on your WordPress site and upload your products. You can also follow a complete WooCommerce setup guide if needed.
Step 2: Set Up a Google Merchant Center Account
- Visit Google Merchant Center.
- Click on Start Now.
- Enter your business name, country, and time zone.
- Add your business website URL.
- Confirm your details and click Continue.
Once you’re done, you’ll be directed to your new Merchant Center dashboard.
Step 3: Install a Google Merchant Plugin in WooCommerce
WooCommerce doesn’t offer a built-in way to connect with Merchant Center. You need a plugin. One of the most popular options is Google Product Feed.
To install:
- Go to your WordPress dashboard.
- Navigate to Plugins > Add New.
- Search for Google Product Feed.
- Click Install Now, then Activate.
Step 4: Set Up the Plugin and Create a Product Feed
After installing the plugin:
- Go to WooCommerce > Settings > Product Feed.
- Click Add New Feed.
- Choose the product types you want to include (all or specific categories).
- Set the format to XML (recommended for Google Merchant).
- Click Save Settings and then Generate Feed.
- You’ll now see a feed URL – copy it.
This feed URL sends product data directly to Google Merchant Center.
Step 5: Upload the Feed to Google Merchant Center
- Log in to Google Merchant Center.
- Go to Products > Feeds.
- Click the + icon to add a new feed.
- Choose your country and language.
- Give your feed a name (e.g., “WooCommerce Feed”).
- Select “Scheduled Fetch” as the input method.
- Paste the feed URL you copied earlier.
- Set the fetch schedule to daily.
- Click Save and then Fetch Now.
Google will pull your product info and list it.
Step 6: Verify and Claim Your Website
To allow Google to trust your store:
- In Merchant Center, go to Business Info > Website.
- Enter your WooCommerce website URL.
- Click Save.
- If you’ve already linked GA4 or GSC using the same Google account, it may auto-verify.
- If not, Google will ask you to add a small HTML code to your site for manual verification.
Once verified, your site is claimed, and product syncing works properly.
Step 7: Fix Common Errors
Sometimes, Google shows errors after you upload your feed. Common issues include:
- Missing product data (e.g., price, GTIN, SKU)
- Image quality is too low
- Wrong availability info
- Description is too short or too long
To fix them:
- Update the product info in WooCommerce.
- Regenerate the feed.
- Fetch the feed again in Merchant Center.
- Check your Diagnostics tab inside Merchant Center regularly to catch these early.
Step 8: Maintain Your Product Feed
Product data must stay updated. If you update prices, stock levels, or product names in WooCommerce, ensure the feed reflects these changes.
- Keep your plugin and WordPress site up to date.
- Check Google Merchant Center weekly.
- Monitor disapproved products and errors.
- Refresh your feed as needed.
Final Thoughts
Connecting WooCommerce to Google Merchant Center helps your products appear across Google Shopping and other platforms. It also saves time by automating updates.
The setup may seem technical at first, but once done, it runs smoothly. Using the right plugin, keeping your product data clean, and checking your Merchant Center regularly will ensure everything works as expected.
Once connected, you’ll spend less time updating products manually and more time growing your business.


