Starting your online store may feel overwhelming. But with WooCommerce, the process becomes simple and beginner-friendly. Whether you’re launching your first store or want more control, WooCommerce offers a flexible and cost-effective solution.
This guide walks you through each step, from setting up WordPress to publishing your first product, with no coding required.
What is WooCommerce?
WooCommerce is a free WordPress plugin that enables your website to function as an online store. You can sell physical products, digital downloads, services, or subscriptions.
Key Benefits:
- Free to install and use
- Easy to set up and customize
- Supports multiple product types
- Backed by a large support community
WooCommerce gives you complete control over product management, payments, shipping, orders, and promotions, all from your WordPress dashboard.
Why Use WooCommerce?
If you want to launch an online store without writing code, WooCommerce is a solid choice.
Why it’s a favorite:
- No coding needed: Everything works with clicks and settings
- Flexible: Customize your store with WordPress themes and plugins
- Secure: Works with reliable payment gateways
- Scalable: Start small and grow as needed
WooCommerce Setup: Step-by-Step
1. Install WordPress
WooCommerce runs on WordPress. You need a WordPress website before setting up WooCommerce.
To install WordPress:
- Choose a hosting provider with a 1-click WordPress installation
- Log in to your WordPress admin dashboard
- Choose a WooCommerce-compatible theme from marketplaces like ThemeForest or WordPress.org
2. Install the WooCommerce Plugin
- Go to Plugins > Add New
- Search for “WooCommerce”
- Click Install Now, then Activate.
WooCommerce will add new menu items and start the Setup Wizard.
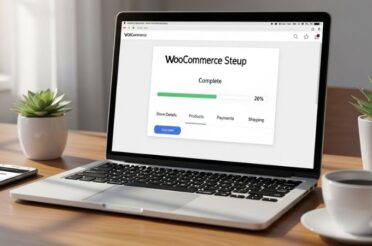
3. Complete the Setup Wizard
The Setup Wizard will guide you through:
- Store Details: Address and contact info
- Industry: Type of business
- Product Types: Physical, digital, or subscription
- Business Info: Your experience level
- Theme Selection: Pick or keep your theme
These settings can be changed later.
Note: WooCommerce creates important pages automatically (Cart, Checkout, Shop, etc.). Do not delete them.
4. Add Your First Product
- Go to Products > Add New
- Add product name and description
- In the Product Data section, enter:
- Price
- Inventory
- Shipping options
- Upload product images
- Click Publish
Use variations for size, color, or quantity options.
5. Customize Your Store Design
Make your store reflect your brand:
- Go to Appearance > Customize
- Change logo, colors, and homepage layout
- Use a WooCommerce-compatible theme
- For advanced control, try Elementor or hire a developer
6. Set Up Payments
WooCommerce supports:
- PayPal
- Stripe
- Razorpay
- UPI (India)
- Credit/Debit cards
To enable payments:
- Go to WooCommerce > Settings > Payments
- Enable your desired options
- Follow the setup prompts.
Tip: Some gateways (like Stripe) need API keys. You can find them in your payment provider account.
7. Configure Shipping and Taxes
Set up shipping based on your regions and product weight.
- Shipping: Go to WooCommerce > Settings > Shipping
- Add shipping zones and methods (e.g., flat rate, free shipping).
- Taxes: Go to WooCommerce > Settings > Tax
- Enable taxes
- Let WooCommerce calculate based on your store location
If tax laws in your region are complex, consider using plugins like TaxJar.
8. Manage Orders
Once your store is live, you’ll receive order notifications.
To manage orders:
- Go to WooCommerce > Orders
- Click an order to view details
- Change status (Pending > Processing > Completed)
You can also integrate WhatsApp Business for real-time order updates.
9. Set Up Email Notifications
WooCommerce sends default emails for:
- New orders
- Shipping updates
- Cancellations
- Refunds
To customize emails:
- Go to WooCommerce > Settings > Emails
- Edit subject lines and content
- Change the sender’s name and email address
For advanced workflows, integrate Mailchimp or HubSpot.
10. Install Helpful Plugins
Boost your store with useful plugins:
- WooCommerce PDF Invoices & Packing Slips
- WooCommerce Discount Manager
- WooCommerce Shipping
- Elementor (for design)
- Rank Math SEO (for better search visibility)
To install:
- Go to Plugins > Add New
- Search, install, and activate the plugin
11. Test Before You Launch
Before going live:
- Place a test order
- Confirm checkout, cart, and payment flow
- Check mobile responsiveness
- Review email notifications
- Fix broken links or layout issues
Final Words
WooCommerce is one of the most trusted ways to start an online store. It’s flexible, secure, and beginner-friendly. With this guide, even a fresher on your team can confidently set up and launch a working WooCommerce store.
Get started now. Your eCommerce journey begins here.


