Not only is it easy to create a free blog, but it’s swift.
Suppose you are even a tiny bit technologically inclined. In that case, you must have come across some blogs on the internet that took your breath away – and you wondered – how they write such excellent blog posts that are interesting and informative – and at the same time, they are fun to read. I’m pretty sure that you, too, might have, at some point, had the urge to understand how to write such creative and informative blogs. You needn’t worry; most of us are not in the same boat as you.
Today, with all the valuable and fantastic blogging tools and platforms out there, it’s a lot easier to get started. You can start from nothing—OK, that would be a stretch. But seriously, all you need is a brilliant idea lurking in your headspace, eager to metamorph into a blog. You can go from an idea to a fully functional viral blog in 30 minutes—or less if you are more innovative.
And the best part? – You can afford to be a dunce here. You don’t need technical skills or knowledge – just the ability to follow simple instructions- and you will already be on the way. I wi h I had such an easy step-by-step process like this when I started blogging years ago. This simple, detailed, step-by-step guide to starting a blog will show what I learned along the way so that you don’t need to spend hours or days hunting and figuring out the right ideas to get you up and running.
Before we dive right into it, I understand that some of you might still wonder why you should start a blog at all. And that’s quite a pertinent question. I have had such thoughts—most intelligent people do, and you should, too. So, let’s quickly head over to WHY you should start a blog and what you can potentially achieve through your blog.
Why should you create a free blog?
Driving without a map is an intelligent way to……get lost. So, considering your reasons for starting a blog as a road sign in the right direction might be helpful. It would help you make your blogging journey even more enjoyable.
- You may want to start blogging because you love writing. That’s the case with most writers in a serious relationship with words—wordsmiths like me. I love to express my ideas and thoughts about anything and everything as beautifully and poetically as possible. It gets better when you have an audience that can respond and relate to your emotions, which makes the whole writing experience more fruitful and worthwhile.
- You can also start blogging to make an impact. For those of you who like to voice your opinions and impact society for good, this small web estate could be your perfect platform. Here, you could say what you want, find the right supporters, and make a significant impact.
- You may want to start blogging to make some money. It’s not something to be ashamed of. You don’t need to be salty to earn some money by blogging. Monetizing your blog doesn’t mean you should stuff it with irrelevant ads.
Blogging opens up more avenues for you. You can use your blog to promote your company website, advertise your professional services, or reach a specific audience. You can also start an e-course to teach some valuable skills to other folks.
For a well-established business, blogging becomes a vital lead generation source derived from well-driven traffic. There are some businesses whose cornerstone has been blogging. Some of the benefits of blogging for a business could be:
- Many blog subscribers are notified every time you post a new blog.
- Your blog can serve as the content engine for your entire company.
- Every year, innumerable link clicks on your blog from all the available social platforms.
- You could multiply your sales figures every month.
You might be tempted to think, OK, that sounds great, but I don’t have the technical knowledge to create a free blog. That’s why I’ll guide you through the steps to start a blog in WordPress – even if you’re a complete newbie without any coding or technical knowledge. So, grab a cup of coffee or tea – if offended.
How to Create a Blog in 7 Simple Steps
Following these simple seven steps should take you about 30 minutes.
- Choose the ultimate blogging platform – Self-hosted
- Choose your Domain Name
- Choose a web host
- Create your host account
- Install WordPress
- Customize the blog’s look and feel
- Publish your first excellent blog post
Enough of the blah blah now! Let’s get down to business right away.
Step 1: Choose the ultimate Blogging Platform – Self-hosted
For those living under the rock, choosing a blogging platform means the software you’ll use to run your blog. If you do not live under a rock, you will know that there are many free and paid blogging platforms.
I think it would be best to go with a self-hosted WordPress. This option will give you your domain name and hosting account, on which you will install the self-hosted WordPress software WordPress.org.
If you plan to start on a free blogging platform like Blogger, Ghost, Weebly, or Tumblr and then migrate to a self-hosted WordPress later on, dump the idea immediately. You can thank me later. So, the best way to get started is a self-hosted WordPress blog.
Why choose a self-hosted WordPress?
- It’s a preferred platform with thousands of themes, plugins, and other goodies.
- It’s pretty reliable, secure, and easy to set up.
- Self-hosted WordPress is the top choice of top bloggers.
The best part is that self-hosted WordPress blogs are not as expensive as you might expect them to be.
Step 2: Choose your domain name
This is where all the magic begins! A domain name is the web address people use to visit your site or blog.
Here are some tips for choosing your perfect domain name:
- Choose a short and catchy name that is easy to recollect and recall.
- Avoid using characters other than letters – they are hard to remember.
- Don’t stuff “keywords” into your domain unless necessary.
- Avoid choosing words that are difficult to spell or recall.
- Use .com if it’s available, as it’s easy for people to remember.

Step 3: Choose a Web hosting
Although WordPress.org is free, you will require a company to host your blog. It’s like giving your blog a “home” online. Choosing your web hosting is one of the essential decisions, so you should pick one that’s highly dependable, very responsive, offers fantastic customer support, and doesn’t cost you a vital organ.
There are many highly recommended host companies worldwide. Compare their features and pricing to see what suits you.
Once you’ve decided upon the host company, the next step is to choose your plan. You need not stress about which package to sign up for, as you can always upgrade if and when you wish to.
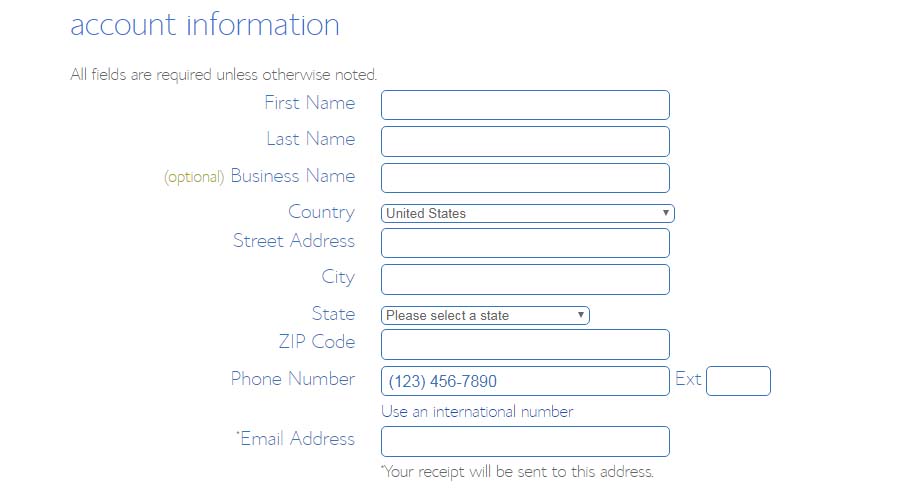
Step 4: Create your Web hosting account
This is where you enter your basic information and contact details and pay for your web hosting. You can choose an account plan, whichever is most suitable for you, money-wise or duration-wise. Generally, all web hosts will ask you to sign up and pay for at least 12 months. However, they usually provide discounts if you sign up for an extended period, say 24 months or 36 months.
Once you’ve finished entering your details, you’ll receive a welcome message confirming your purchase and asking you to choose a password for your host account.
Step 5: Set up WordPress
Once you’ve signed up for your web host account, you’ll receive login credentials for your website’s control panel. You can access the backend of your website, although you won’t need to use this control panel regularly. This is just one of the techy aspects of running your blog.
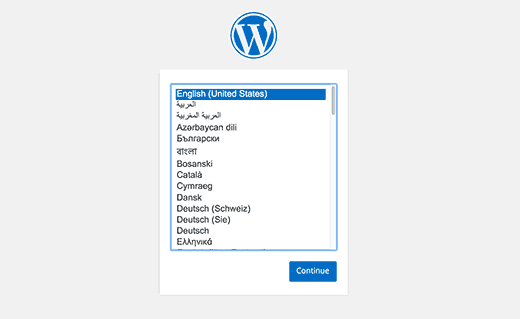
You may access your control panel account at www.yoursite.com/cpanel (of course, you must substitute your domain name here). Once logged in, you will see a box and an “Install WordPress” icon. It will then automatically walk you through the simple WordPress setup process. Keep calm—it takes 2 minutes to install.
The system will ask which domain you want to install WordPress on. Choose the domain name you decided on in Step 2. You will find a field next to your domain name that says ‘Directory.’
The question you need to ask yourself is: Do you want people to find your blog at www.yoursite.com or www.yoursite.com/blog? Generally, if your blogs are the main subject of your site, you’ll want to host the blog on the main domain. In this case, you will need to leave the directory field blank. This means people can visit your blog by directly going to http://www.yoursite.com.
On the other hand, if your blog is an offshoot of your main website (suppose you want a dedicated site for your business and blogs as one of the parts), enter the blog in the directory field. This means people can visit your blog by going to www.yoursite.com/blog.
After you’re done here, you may click Next.
OK, now you’re almost done—just a little patience. Hold on a little longer, and it will be worth it.
This will be the last step before your blog is up and running. If you go to Advanced options, you can edit your WordPress username and password and give your blog a tangly title.
Your WordPress blog should now be installed, and you can access it by using the information sent to your inbox—username, password, and the admin URL of your blog. It should read like www.yoursite.com/blog/wp-login.php or www.yoursite.com/wp-login.php.
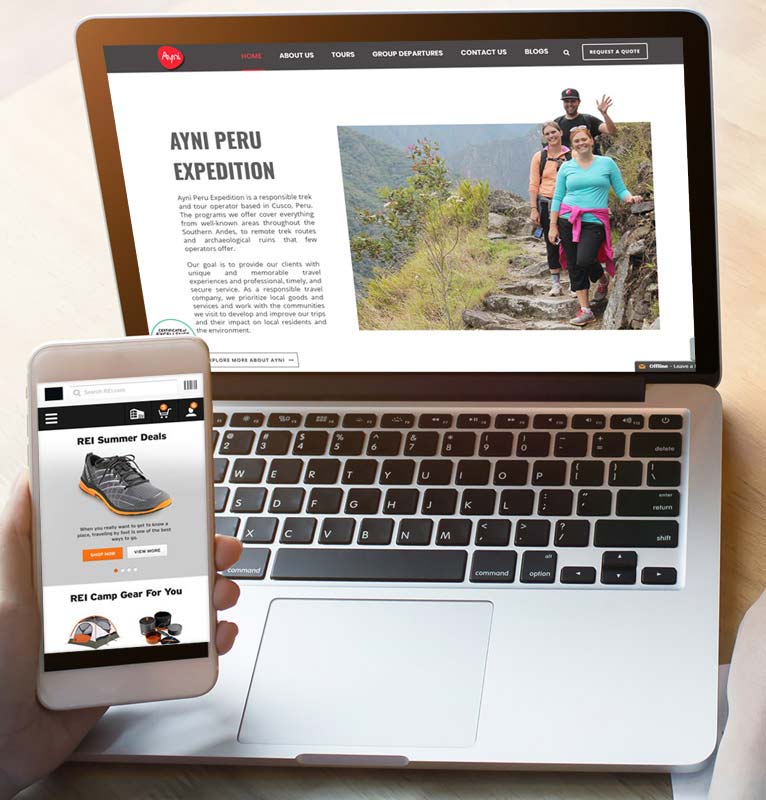
Step 6. Desi n your blog as you like
Now that you’re done setting up, you can start to focus on designing your blog so that it looks exactly as you envisioned it or any way you want it to be. One of the best things about a self-hosted WordPress site (of which you are a proud owner now) is that you can use hundreds and thousands of free themes to enhance the look of your blog. Themes allow you to change your site’s look and feel and alter the number of columns, colors, style, and layout at the click of a button.
If you are interested in the nitty-gritty details, here’s how:
Go to Appearance on the left side panel, look for the paintbrush icon, and click Themes.
Click on Add New. You can now browse through thousands of free themes, sorting them by Latest, Popular, Featured, etc. If you know what you want, you may also search by keywords. When you find the one you’re looking for, click Install. Your blog will automatically acquire the selected theme’s look and feel.
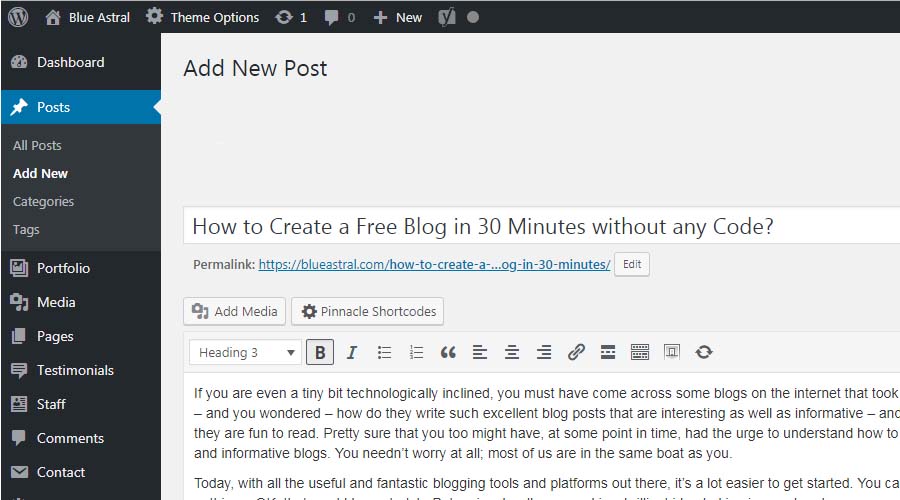
Step 7. Write your first blog post
If you know how to use MS Word, writing your first post in WordPress is easy. On the left side of your WordPress Dashboard, find the Posts button (the thumbtack icon) and click Add New.
You can now enter the title of your blog post at the top bar and start writing your blog content in the box below. Like in MS Word, here, too, you have a variety of options for formatting your post: bold, italic, strike-through, bullets, numbered lists, alignment, adding links, adding images, adding media (videos)
Want to customize your blog further?
What I love about WordPress is that you can use it right out of the box or easily customize it to feed your growing blog.
Some ways to change your blog’s look, feel, and function are listed below.
Settings
The settings icon on the left side of your dashboard allows you to customize a wide range of features on your blog. Some examples include your site name or tagline (under General), what you want your homepage to look like (under Reading), whether you want visitors to be able to interact with your posts or not (under Discussion), and what you want your URLs to look like (under Permalink Settings).
Widgets
You can add These tiny bits of code to your blog’s sidebar. They let you add different functions to your site (for example, an opt-in box, banner ad, menu, etc.) without coding yourself – that’s a relief! You can add or edit your widgets by clicking on Appearance and Widgets.
Plugins
Plugins are quite possibly my FAVORITE thing about using WordPress! They let you add functionality to your blog without touching the code. You can add or edit your plugins by clicking on the plug icon on the left side of your dashboard. Some of my favorite plugins include:
- Yoast SEO: Let’s do the SEO and automatically optimize your blog posts for the search engines.
- Google Analytics: Let’s see how much traffic you get to your blog and where it’s coming from.
- Contact Form 7: If your theme doesn’t include a contact form, this plugin will help you get one up and running in minutes.
- Yet Another Related Posts Plugin (YARPP): You know how some sites show little images and links below blog posts with a heading like “Here are some other posts you may be interested in?”. This plugin will let you add this to your blog.
Congratulations! You’re now officially a blogger!
You’re done setting up your blog, and now you’re ready to start making an impression on the world through your writing.
Your WordPress blog will serve you well for many years to come. By tweaking your theme and adding new widgets and plugins, you can keep your blog fresh and up-to-date with the click of a button.
If your blog takes off to greater heights and you need additional email accounts, storage, or even another website, you can upgrade your account anytime.